LED FADE

🔰 Introduction
Learn how to build a smooth LED Fade project using Arduino UNO or ESP32. This beginner-friendly project demonstrates Pulse Width Modulation (PWM)—a technique that allows you to control LED brightness gradually over time.
🔧 Components Needed
| Component | Quantity | Notes |
|---|---|---|
| Arduino UNO or ESP32 | 1 | Any compatible board |
| LED | 1 | Any color |
| Resistor | 1 | 220Ω recommended |
| Breadboard | 1 | Optional but makes connections easy |
| Jumper Wires | 3–4 |
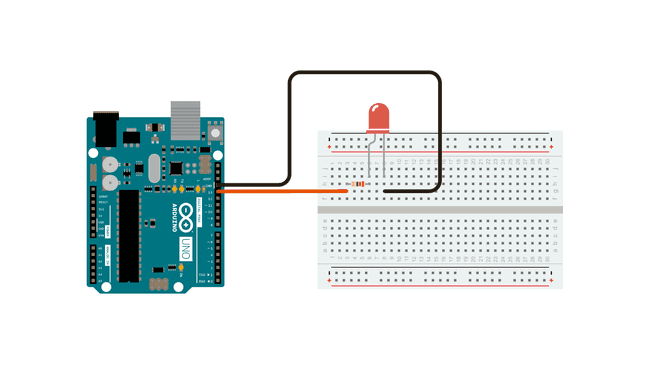
📷 Circuit Diagram
🧩 Schematic Diagram
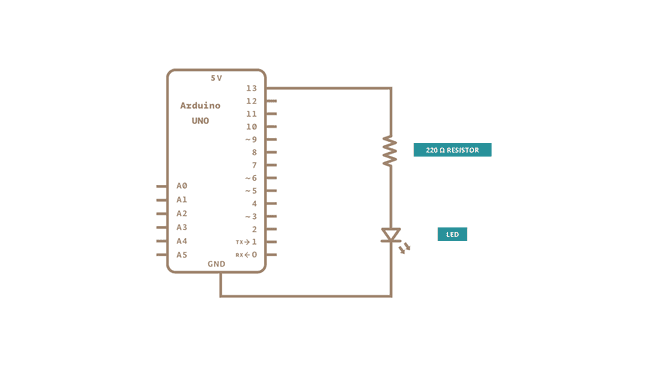
🛠️ Wiring Instructions
- Insert the LED into the breadboard.
- Connect a 220Ω resistor to the long leg (anode) of the LED.
- Connect the other end of the resistor to PWM pin 9 (for Arduino UNO).
- For ESP32, use a PWM-capable pin like GPIO 5 or GPIO 18.
- Connect the short leg (cathode) of the LED to GND.
- Plug the board into your PC using a USB cable.
🧾 Arduino Code
arduino-led-fade-pwm.ino
int led = 9;           // the PWM pin the LED is attached to
int brightness = 0;    // how bright the LED is
int fadeAmount = 5;    // how many points to fade the LED by

// the setup routine runs once when you press reset:
void setup() {
  // declare pin 9 to be an output:
  pinMode(led, OUTPUT);
}

// the loop routine runs over and over again forever:
void loop() {
  // set the brightness of pin 9:
  analogWrite(led, brightness);

  // change the brightness for next time through the loop:
  brightness = brightness + fadeAmount;

  // reverse the direction of the fading at the ends of the fade:
  if (brightness <= 0 || brightness >= 255) {
    fadeAmount = -fadeAmount;
  }

  // wait for 30 milliseconds to see the dimming effect
  delay(30);
}