LDR WITH ARDUINO
🔰 Introduction
Learn how to build the classic LED Blink project using Arduino UNO or ESP32. This project helps beginners understand how digital output works on microcontrollers.
🔧 Components Needed
| Component | Quantity | Notes |
|---|---|---|
| Arduino UNO or ESP32 | 1 | Any compatible board |
| LED | 1 | Any color |
| Resistor | 1 | 220Ω recommended |
| Breadboard | 1 | Optional but helpful |
| Jumper Wires | 3–4 |
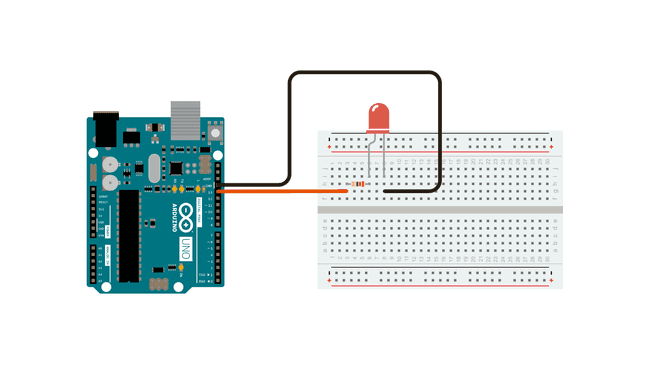
📷 Circuit Diagram
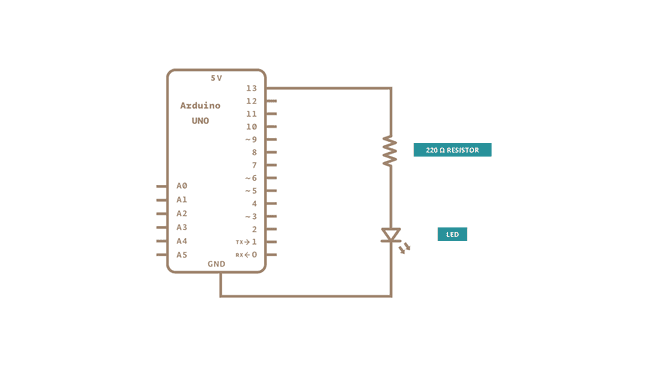
🧩 Schematic Diagram
🛠️ Wiring Instructions
- Insert the LED into the breadboard.
- Connect a resistor to the long leg (anode) of the LED.
- Connect the other end of the resistor to digital pin 13.
- Connect the short leg (cathode) of the LED to GND.
- Plug the Arduino or ESP32 into your PC via USB.
🧾 Arduino Code
arduino-led-blink.ino
void setup() {
  pinMode(13, OUTPUT);
}

void loop() {
  digitalWrite(13, HIGH);
  delay(1000);
  digitalWrite(13, LOW);
  delay(1000);
}
No Comments yet.